I guess it’s one of those things where if you do it you have to teach it…
Here’s how I bumbled my way through mine! I’d seen mention of Hugo/Jekyl on Twitter in the infosec circles I followed since people were looking for something lightweight, secure and versatile. I kind of ignored it because I was using WordPress at the time, but eventually I wanted a new challenge and something cheaper so Hugo came back to my attention. I decided to use Azure as a host since I wanted to burn some trial credits as well as gain experience with Azure.
I tried to follow a few blog posts but I found they all missed two key areas:
- Setting up your IDE/editor
- Creating and uploading the final product in more detail
Before we get our hands too dirty:
Just to set expectations of understanding, here’s a quick/short list of software and accounts you’ll need to get going:
- Azure trial account
- An IDE. My Personal choice is VSCode. Notepad++ also works well as does just about any other IDE really.
- You favorite Git repository or change tracker (For ease of use and backups really). Again, I personally use Github Desktop because I’m a filthy casual.
- A rudimentary understanding of YAML or basic Markdown syntax
In regards to the specific ins and outs of Hugo, I highly recommend the following YouTube series by Giraffe Academy: Hugo - Static Site Generator |Tutorial
Installing Hugo:
I’m selfish and will only go over the Windows installation from a Windows 10 perspective. Go ahead and grab the latest build for Windows from here
Extract the zip file into your directory of choice. In my case, I personally used the top level of my C:\ drive on my dev laptop because YOLO!

Next, you’ll want to add a listing in your Paths variables for ease of use. To do this, open up your ‘System’ panel, then go to ‘Advanced system settings’.
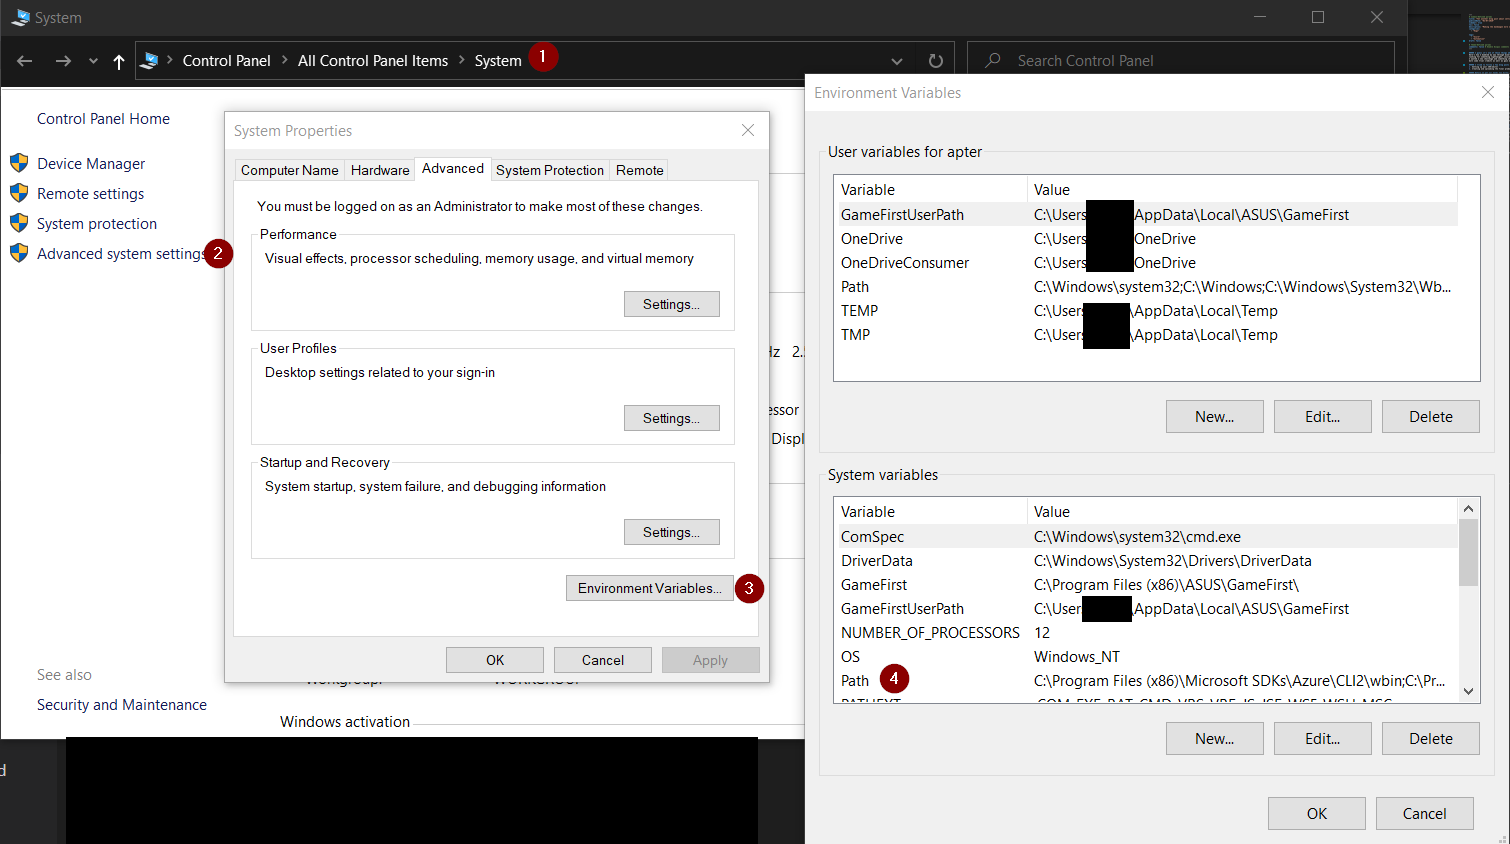
Once there, you’re going to want to add the path for your hugo /bin directory where the hugo.exe file is located.
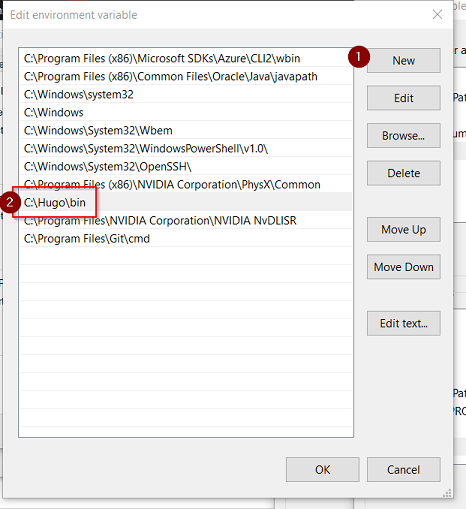
This will allow you to use the hugo command regardless of which directory you’re working in which will come in handy later as we setup our site/git structure.
Setting up your first site, picking a theme and customizing:
After that, we’re going to want to create a new base site by running the following from either Command Prompt or PowerShell:
hugo new site <sitename><sitename> is obviously your site name of choice FYI… At this point, we need to add some flair to our site. Go and browse one of the Hugo theme repositories and choose your preferred design. Once you have it, you’ll want to place it into your ‘themes’ folder in the new site hierarchy that was created when we ran the hugo new site <sitename> command.
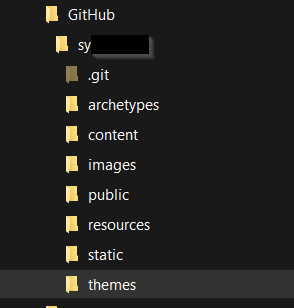
You’ll notice my site is in a Github folder, this is because I’m using Github for my site repository.
Run a local copy of the site by running the following from either CMD or PowerShell:
hugo server -D That should run and you’ll see something similar to this:
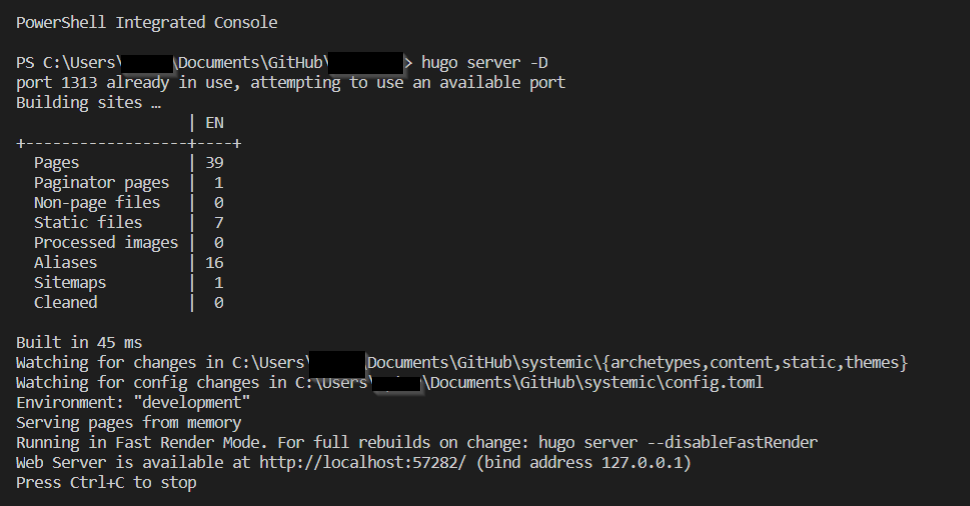
Now you can open a web browser and to http://localhost:1313 where you’ll see your barebones theme/site!
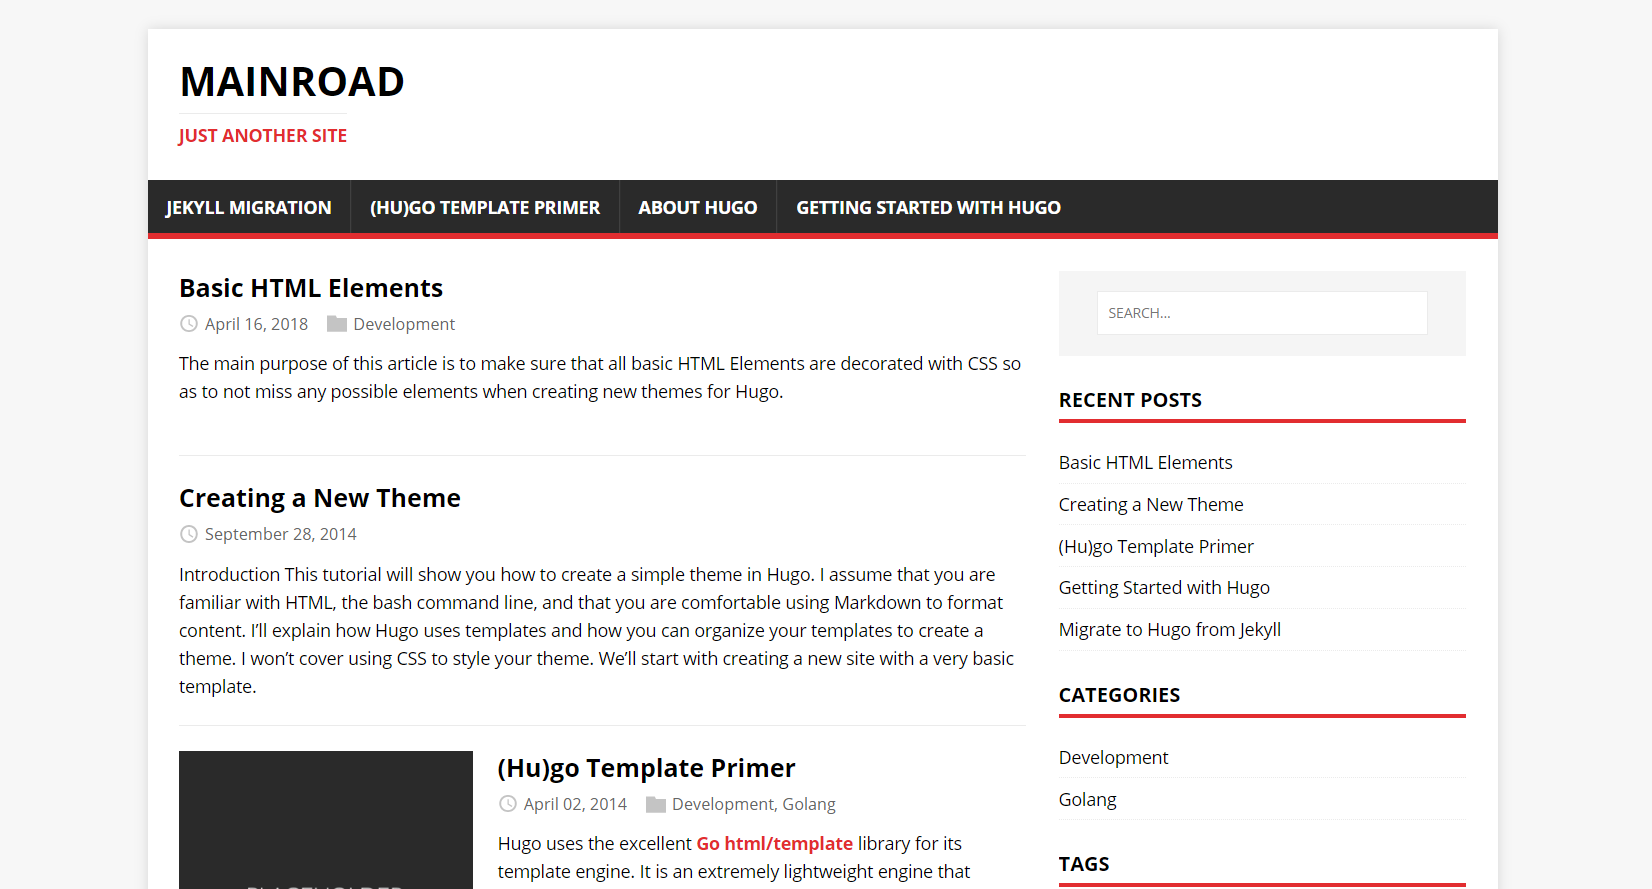
At this point, you’ll want to go and generate content/tweak the theme to your liking of course. As long as you leave the CMD or PowerShell window up with the hugo server -D running, your site will automatically refresh and update as you work!

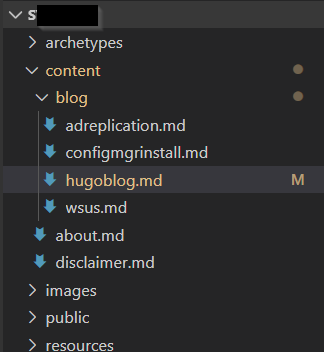
You’ll want to add content to the ‘content’ folder. You can create sub folders and structure here for various posts and post types as I have here:
Then, you’re off to the races! Start making some posts or creating content. Refer to the Giraffe Academy videos linked earlier for more details about this. Once you have everything customized and created, you need to publish which is where Hugo takes all of that Markdown and turns it into sweet, sweet HTML. To publish, you’re going to want to add your configuration template to your config.toml file then run the following command:
hugo deploy --confirmThis last step was lost on me. I tried just loaded all of the files into an Azure storage blog and hoping for the best, but alas, it took a little Google luck to find that last step…
And there you have it! You’ve now published your very own Hugo blog! Now go forth and write your first or second post on how you did it. Fill in more details that I missed because I’m sure there are plenty and I’ll likely do follow-up posts.